Happy Friday, friends!
Today I want to share a post that I started back last summer and never finished. I'm coming up on two years since I bought my first house. I thought I'd have my home completely put together within about 3 months. What was I thinking?! That did not happen. It's almost two years later, and I'm just now feeling like my house is really coming together.
I haven't done any
major renovations, but I've completed a ton of projects. I had a lot of pieces of furniture that were old from college, but since I'm not ready to invest in all new pieces because this isn't my forever home, I decided to take on some DIY projects. My first furniture project was to redo my bedroom dresser.
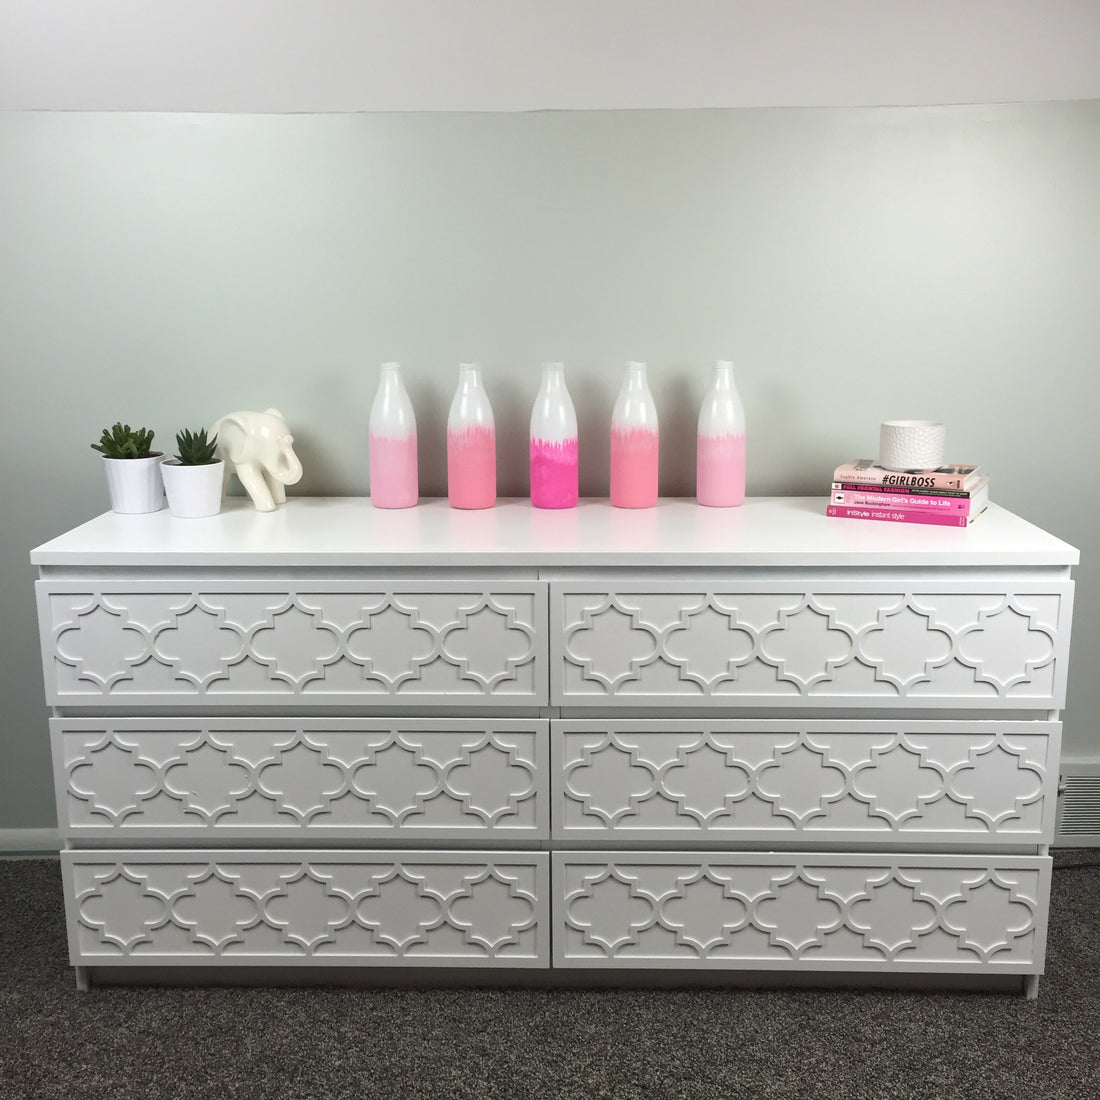
I've had this dresser for about 10 years now (cue the 'I'm getting old' panic attack). This thing has been with me in 7 different living spaces and has moved across the country once. Needless to say, it's seen better days. My bedroom is very light and airy, so I decided my dresser needed to take on that feeling as well. I did a little research about refinishing Ikea furniture and came across
O'verlays. I ended up purchasing the
Jasmine kit for my Malm dresser.
Alright, let's get into how I transformed this ugly guy!
I wiped the entire dresser down to clean off anything that may have been on it. Then I lightly sanded every angle of the dresser that would be showing once the drawers were put back in.

Next up, it was time to prime and paint the dresser. The primer I used was the
Zinsser B-I-N Primer. I found this one was great to really cover everything up and also stick to the material of the dresser. Then I chose to paint the dresser white. It took 2 coats of primer and 2 coats of paint to cover it evenly.
After the paint dried, I applied the
O'verlays on the drawers. This was done with just a little bit of
Gorilla Glue. I put it on the O'verlay piece instead of on the drawer so I could more accurately place the glue. You have a few minutes to move the piece around before it's set. Let the glue dry completely for 24 hours before reassembling the furniture.

5. Once everything is dry, it's time to put the furniture back together and place it in its new home!


I shared a tutorial on
these painted bottles last year. They're SO easy and can give any space a pop of color. I'm so happy with how this dresser turned out. I think it looks pretty great, and all together it cost about $75 to give it a new life.
I hope you enjoyed seeing a bit of a different post from me on this lovely Friday morning! I'm definitely going to be sharing more non-fashion related content. Have a wonderful weekend, friends!
xoxo,
Sarah